Turn your Launchpad into a Bongo with Custom Modes
How many times has this happened to you when writing or demoing a new idea? You’ve laid down a solid foundation for a track with all the usual elements — drums, bass, guitar, keys; yet in-between the space of the track you feel something is missing.
This exact scenario happened to us recently. The element that was missing? Bongos. We didn’t have any to hand and the thought of rigidly writing in a MIDI track didn’t fit with the looser vibe of the track that demanded the feel of a real performance. Enter: Launchpad.
The beauty of so many of our MIDI controllers is the ability to find hidden solutions at every turn. Our products have been designed with the intention of putting the power of creativity in the hands of the user and the Launchpad range is no exception in this case.
Our solution was to create a Custom Mode within Components that simulated the feeling of playing a real bongo. Including different areas of the ‘bongo skin’ and being able to play the pads with our hands was a must, so we got to work. We’ll let you be the judge of whether ‘Bongo Mode’ — as we’ve so aptly named it — was a success by watching the video above. Read on to see how it was set up.
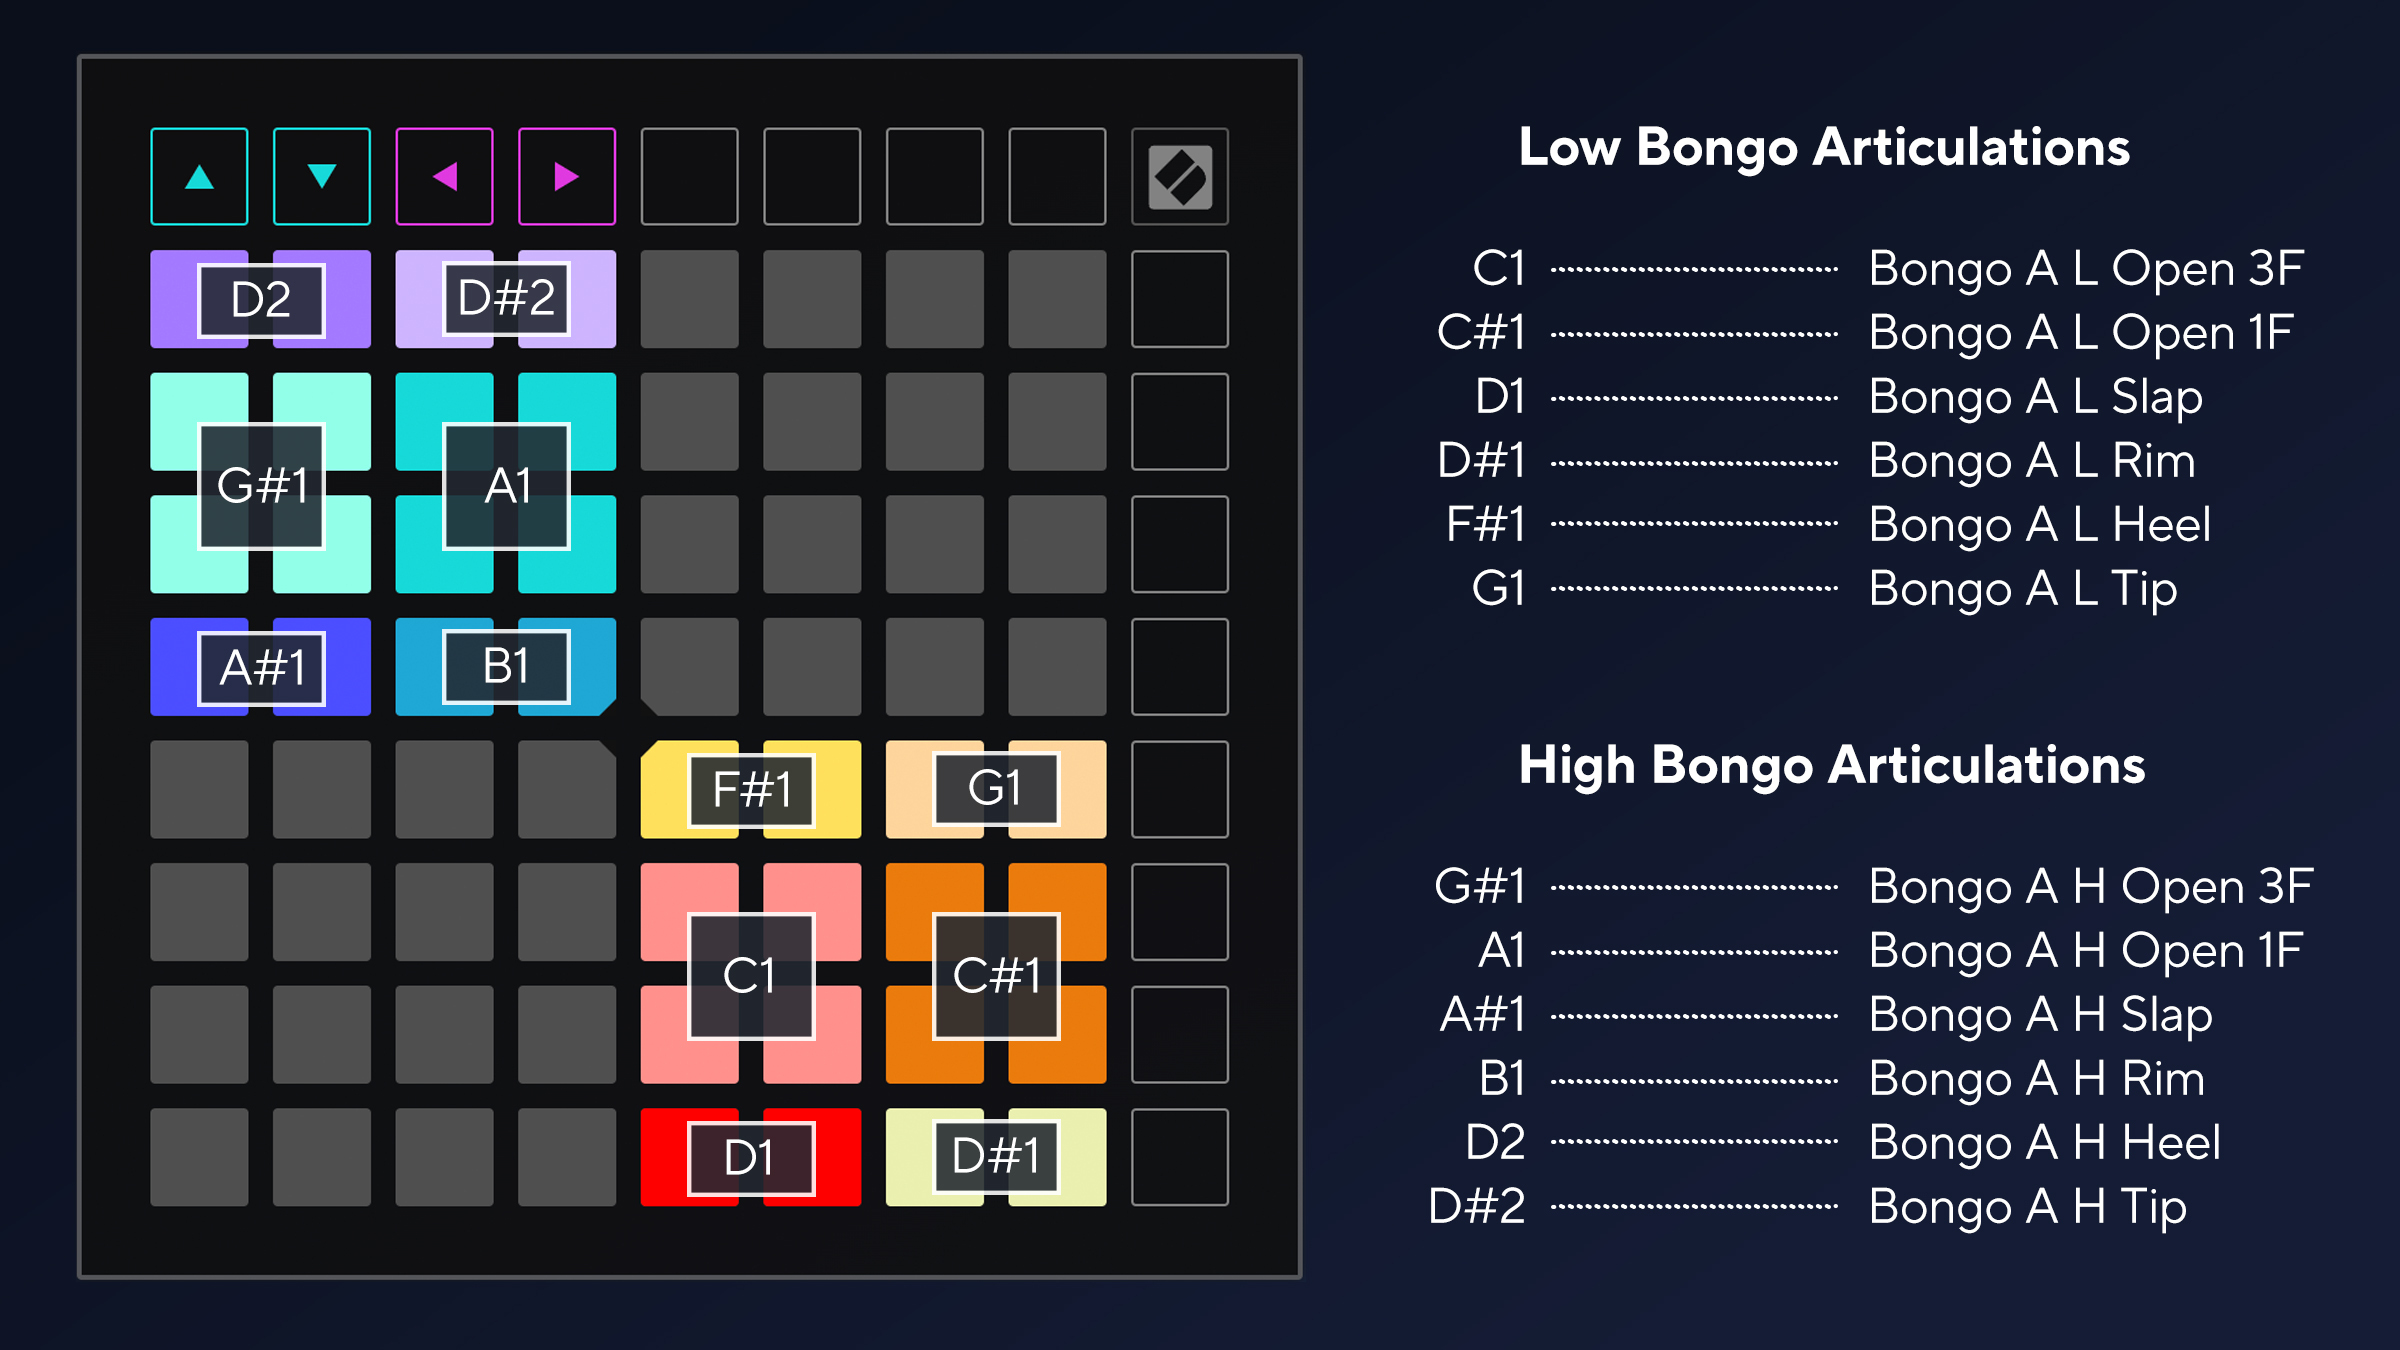
Our recommendation in setting up a Custom Mode like this would be to first source a software instrument that suits your needs. For the track in the video, we used Ableton Live’s Bongo A instrument, found in Ableton’s Latin Percussion pack. Bongo A contains some very well recorded articulations of a high and low bongo as well as many customisation options including pitch controls. For both the high and low samples, we used two different ‘open’ articulations, as well as a slap, rim, heel, and tip sound. After making note of which MIDI note would trigger each of these different hits, we had our foundation to build our Custom Mode.
With our Launchpad loaded up within Components, we created a new Custom Mode and got to work. One whole ‘Bongo’ skin would be a 4x4 grid, with enough room to fit two of these grids at a diagonal orientation. Keeping these two grids diagonal was the best way to avoid any unwanted hits of the wrong sample when playing the pads with our hands. Our bongo grids are laid out in a 2-2-4-4-2-2 formation. We used the MIDI Note Custom Mode Widget in Components and selected the note in relation to the sample in the Ableton instrument, repeating the same note on different pads to allow for a hand percussion performance. The main ‘open’ samples sit in the centre of the skin side by side, taking up four pads of the same MIDI note each. These will be the most often hit pads, so it’s important we left room for our hands to connect with them every time. Around the edges of the grid, we used two pads for every other articulation — loosely taking the geography of a bongo skin into account. Once we were happy with the layout, the same process is repeated for the other drum.

Another important element we considered was to create something that was easy to understand visually, so we stuck to a colour palette for each bongo and used slight colour variations for each cluster of notes within the grid. Once that was all ready, all that was left to do was send our newly created Custom Mode to our Launchpad, load up our Bongo instrument in Ableton, and play.
Ultimately, this idea can be used for many applications and isn’t limited to the one bongo instrument we chose. We encourage you to take the concept of our newfound, and perhaps life changing, Bongo Mode, and apply it to something that suits your setup. That being said, if you would like to explore what you can see in the video, you can download it here.
